12 Steps of Surya Namaskar To Rise Like The Sun
- Blog
- /
- Yoga Poses and Sequences
- /
- 12 Steps of Surya...

Surya Namaskar (Sun Salutation)
Do you ever feel completely drained, as if every ounce of energy has left your body? Perhaps your brain feels like it’s whirring like an engine, and the ache in your head and body is as if an elephant tripped over you. When work seems never-ending, responsibilities become unfulfilling, and life loses its shine, it’s time to escape your routine and step onto your yoga mat.
Sun Salutation is an incredible way to revitalize yourself, bringing radiance and life back into your bones. The immense energy the Sun radiates through its rays holds the potential to revitalize every life force on Earth.
Practising Surya Namaskar poses with the rising sun can infuse you with energy and power. Not only does it boost physical strength and vitality, but the benefits of Surya Namaskar also extend beyond the physical, fostering mental harmony and inner peace.
Surya Namaskar, or the Sun Salutation, involves a sequence of 12 steps linked with the solar plexus, which raises the solar energy within the body when activated through this sequence. It induces self-confidence, self-worth, and a regained sense of purpose.
After warming yourself up with several repetitions of Surya Namaskar, you will feel energized, confident, and ready to take on challenges in life.
There are several variations to this Surya Namaskar sequence, each offering unique benefits. Consistency is key, so sticking to one version and practicing it regularly is recommended.
12 Steps of Surya Namaskar
Here are steps of surya namaskar with names (12 Poses of Surya Namaskar).
Step 1: Pranamasana (Prayer Pose)
- Stand upright on the yoga mat with your feet together, distributing your weight equally on both feet.
- Take a deep breath, expand your chest, and relax your shoulders.
- With another inhale, bring your hands together, palms touching each other in prayer before the heart.

This is the first Namaskar towards the Sun.
Step 2: Hastottanasana (Raised Arms Pose)
- From your prayer pose, breathe in, lift your arms above your head, and slightly lean backward.
- Ensure your biceps are close to your ears.
- Stretch your whole body.
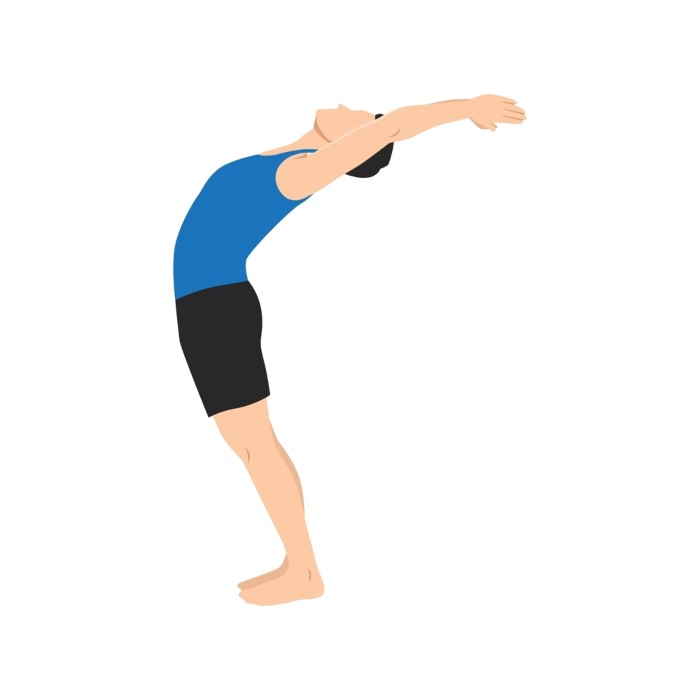
This stretching loosens up the knots in the entire body.
Step 3: Padahastasana (Standing Forward Bend)
- As you exhale, bend forward from your waist and bring your arms down to touch your feet.
- Make sure your spine is erect.
- You can bend your knees if necessary.
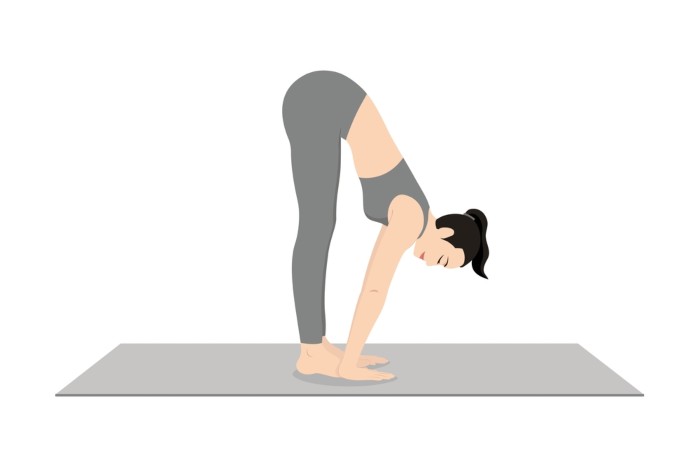
This asana, along with various Surya Namaskar poses, stretches and strengthens the back, abdominal muscles, and nervous system.
Read More – 7 Excellent Benefits of Padahastasana (Hand Under Foot Pose)
Step 4: Ashwa Sanchalanasana (Equestrian Pose)
- Inhale and extend your left leg behind as far as possible.
- Bring your left knee down to the ground and uncurl your back foot.
- Fold your right knee closer to the chest and spread your fingers wide.
- Look up and bend your neck slightly backward. Breathe deeply.
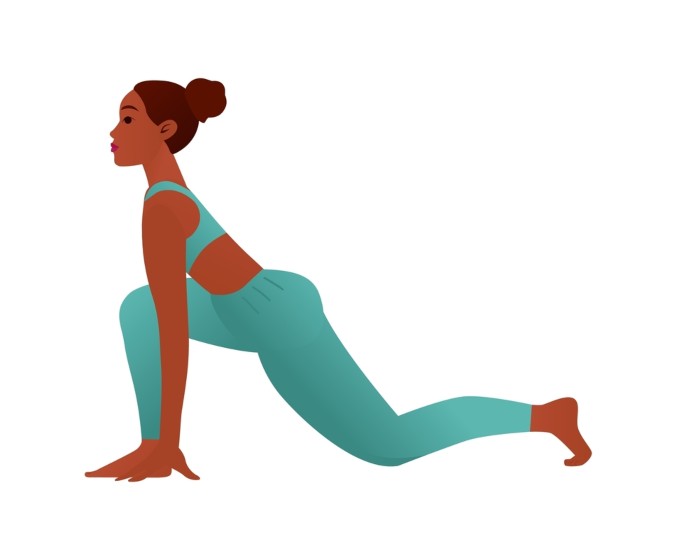
This posture increases flexibility in the legs.
Step 5: Dandasana (Stick Pose)
- Curl your left foot and send your right leg behind to meet the left toe.
- Bring your body into a straight line, keeping it parallel to the floor.
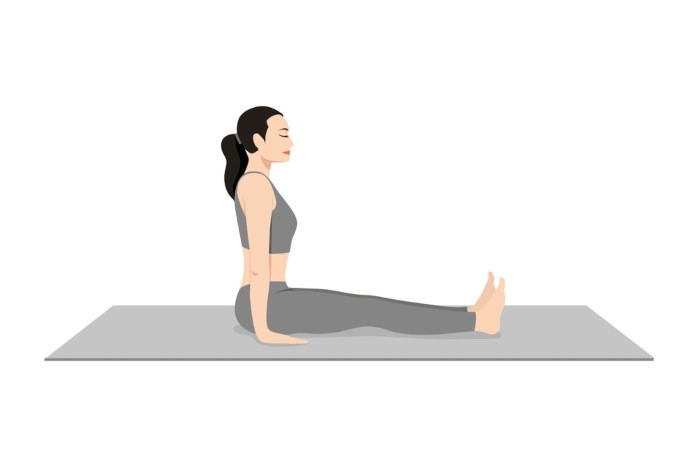
This is one of the great Surya Namaskar poses that tones the wrists, legs, and arms and prepares the practitioner for more challenging arm balances.
Also Read: Top 7 Health Benefits of Yoga
Step 6: Ashtanga Namaskar (Eight Limbed Pose)
- Breathe out and slowly bring your knees down to the floor.
- Rest your chin, chest, hands, and feet on the ground, and raise your hips and abdomen.
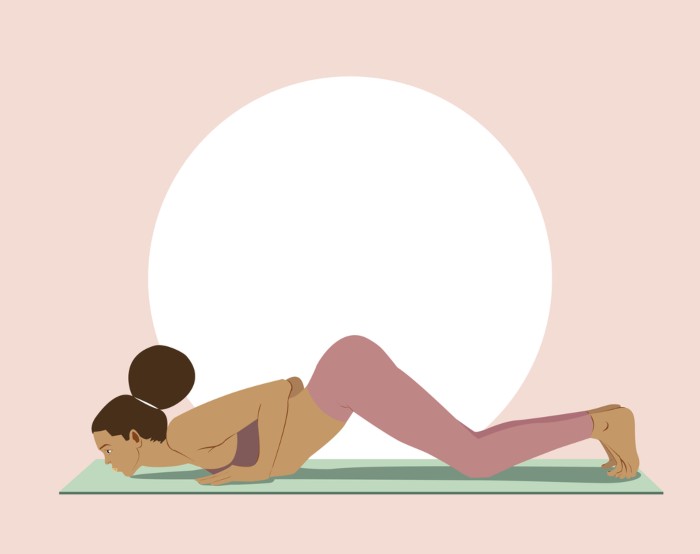
This yoga asana strengthens the chest muscles and hands.
Step 7: Bhujangasana (Cobra Pose)
- Tuck your elbows to the side of your body and press your palms onto the mat.
- Inhale and lift your chest and head off the ground.
- Rotate your shoulder blades away from the ears and arch your neck backwards.
- Send your gaze upward.
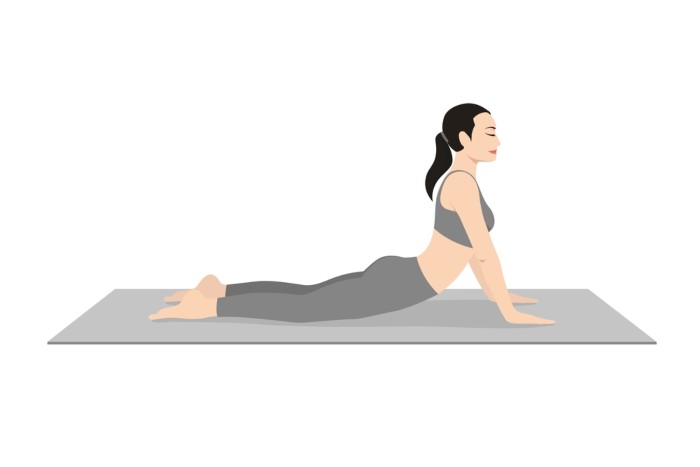
This pose is perfect for treating headaches and backaches.
Read More – Top 10 Health Benefits of Bhujangasana (Cobra Pose)
Step 8: Adho Mukha Svanasana (Downward Facing Dog Pose)
- Exhale and reach your hips and tailbone up to form an inverted V.
- For a deeper stretch, try to touch your heels to the ground.
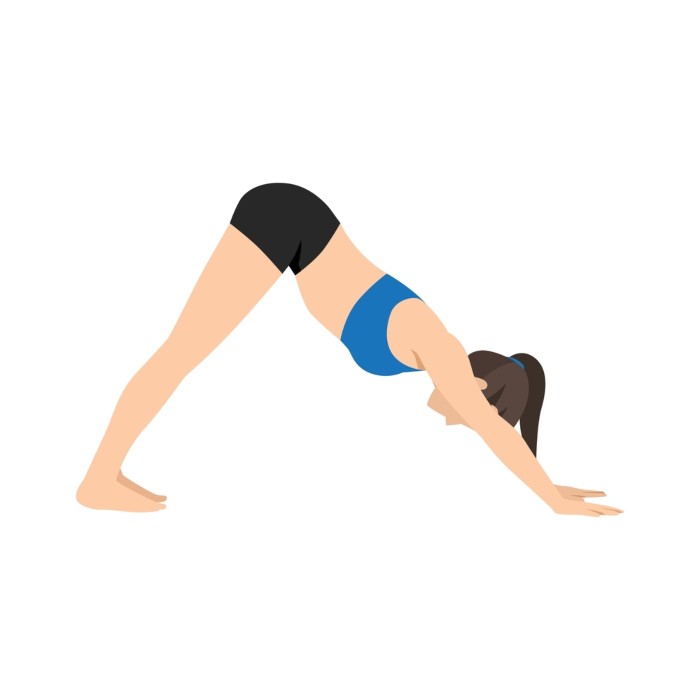
This asana relieves stress, improves blood circulation, enhances respiration, and improves posture.
Step 9: Ashwa Sanchalanasana (Equestrian Pose)
- From your downward-facing dog, lower your knees and return to the equestrian pose, but this time with the left leg in front and the right leg stretched behind.

Step 10: Padahastasana (Standing Forward Fold)
- As you exhale, gently bring your right foot next to your left foot.
- Keep the position of your hands intact.
- Bend your knees if necessary and breathe deeply.

Step 11: Hastottanasana (Raised Arms Pose)
- With an inhale, stretch your arms up and overhead.
- Slightly arch your spine backward.
- Stretch your body upwards instead of backward, and keep your biceps close to your ears.

Step 12: Mountain Pose (Tadasana)
- Exhale, and bring your arms down.
- Stand upright in a relaxed position.
- Feel the positive vibrations within your body and mind.

Also Read: Tadasana – Top 5 Excellent Health Benefits
Conclusion
The sequence of 12 steps in Surya Namaskar provides an unparalleled experience of serenity and refreshment, echoing throughout your body as you absorb the nourishment from this rejuvenating practice. Surya Namaskar encourages a healthy body and mind, influencing you to make it a daily practice and create a better version of yourself.
Also Read – Top 10 Excellent Benefits of Sun Salutations
To dive deeper into the realm of other variations of Sun Salutation or explore different incredible yoga asanas and practices, check out our Yoga Teacher Training In India. Discover how the 200 Hours Yoga Teacher Training in India, 300 Hour Yoga Teacher Training in India can transform your yoga journey.
So, what are you waiting for? Be prepared with your yoga mat to greet the Sun and reap the nourishing benefits of Surya Namaskar yoga. Whether you’re a beginner or an advanced practitioner, starting Surya Namaskar can invigorate your life and bring you closer to a harmonious existence.

